

The home owners
Robin and Danny, shown right here with 1-year-old daughter Samantha, relocated into this 1992 house 3-1/2 years ago. With all the home completed, they plan to handle window repair works after which repaint the outside. Which should keep them busy for a time!
Robin and Danny's door had been dented and drafty. They required a fresh door, and now we needed somewhere to photograph a door set up story. It was a fantastic match. Robin and Danny consented to put in the entranceway by themselves with my assistance. I've set up a large number of doors throughout my carpentry job, thus I knew how exactly to guide all of them through the pitfalls. I must confess, however, there have been a few times once I cannot withstand jumping in to assist. Nonetheless, the latest home owners did a great job of ripping from old door and installing a brand new one. The brand new home seemed terrific—we had been all-happy using results. Discover how exactly we went in regards to the task.
Step 1: gauge the old door and purchase the brand new one
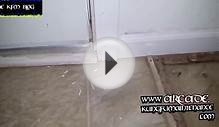
Photo 7: Set the entranceway frame
Robin and Danny could sleep easy now. The door framework slid in to the orifice as in the pipeline in addition to heavy-lifting part of the task ended up being done.
Aided by the old home away while the opening prepared, we were willing to put in the brand new home and sidelight. Before we began, I explained to Robin and Danny our objective was to set the newest door frame within the opening after which adjust it with shims until the door fit perfectly. Initially we eliminated most of the packaging product through the new door and hoisted it to the opening to test the fit. The width had been slightly tight. We didn't have much wiggle space involving the siding and stone molding, however it ended up being obvious we're able to make it happen. Therefore we eliminated the doorway product and Danny applied heavy beads of polyurethane caulk to your sill and exterior sheathing (images 6 and 7). Danny and Robin relocated the doorway towards the opening and tilted it into place (picture 7).
Action 5: Shim, square and fasten the framework
Picture 10: Shim the entranceway frame
Danny slid pairs of shims behind the hinges and across the sidelight in the reverse part. He positioned the shims to produce a much gap all over door.
Picture 10A: Close-up of shims
Use sets of shims to connect spaces.
Picture 11: Secure the frame with screws
After checking to ensure the entranceway ended up being contacting the weather stripping evenly and operating smoothly, Danny drilled countersink holes and drove 3-in. screws through the jamb at each and every shim location. To secure the hinge side, he eliminated one short screw from each hinge and replaced it with an extended screw.
Now we had been prepared tack it in and add shims. Shimming a door is the most vital area of the set up because it's whenever you tweak the framework to really make the door fit completely and operate efficiently. We aided Robin and Danny center the top the door framework with an equal caulk area between your siding in addition to trim on each part, and tack the 2 top corners with 16d galvanized casing fingernails, permitting the heads stand out so we will make alterations later if required (Photo 8).
Following, Robin held an even toward hinge-side trim while Danny pried regarding the framework through to the jamb was plumb (Photo 9). We drove another nail at the bottom of hinge-side jamb to hold the frame plumb. Aided by the door temporarily tacked set up, Danny and I headed around through the back door with several bundles of timber shims. We gave him tips as he wedged sets of shims behind the hinges and over the top and far region of the frame. The target would be to develop a level gap amongst the door additionally the framework (Photo 10). The answer to shimming is glance at the gap between your home while the frame, and then determine how it is possible to wedge the framework to fix any problems. We spent about 45 moments adjusting shims before we were content with what sort of home fit.
“i did not realize that shimming a home had been such a fussy, time consuming work.”
— Danny
Fingernails through the exterior trim support the door framework temporarily, however they cannot offer sufficient support to help keep the doorway square with time. For that we nonetheless necessary to drive 3-in. screws through the jamb and to the wall framing (picture 11). We drove the screws within shim locations to put on the shims in place and get away from bending the jamb. Then Danny put the nails that we had left protruding and added fingernails about 16 in. apart over the exterior trim. After Danny finished this step, he made one last check associated with home's easily fit in instance adjustments were needed before we added insulation and reinstalled the inside trim.
Action 6: Add the finishing variations
RELATED VIDEO


Share this Post
latest post
-
 Doors Handles and Locks October 12, 2022
 -
 Hardware for French doors interior September 28, 2022
 -
 Interior Door Hardware September 28, 2022
 -
 Wicker out Door Furniture September 28, 2022
 -
 Lever Handles Door Hardware September 27, 2022
 -
 Soft close Door Hardware September 14, 2022
 -
 Commercial Doors, Hardware, Parts September 14, 2022
 -
 Drawer Door Knobs September 14, 2022
 -
 Front door furniture UK September 14, 2022