 The sum total price for this door - timber and equipment combined - was under $100. NOT AS MUCH AS $100, YOU GUYS.
Here is the description:
Wood - $40
Wheels - $30
Metal rails & tubing - $25
In the event that you currently have the door, then that's only $55 for equipment - $55 versus $400. It does not need nearly as much power tools while you might believe, either: only a very good drill and an angle grinder with a steel cutting disk to slice the metal rails. (if you are making the door, additionally require a circular saw - or a hand saw and a lot of patience. :D)
So...you prepared because of this?! Then let us get to it.
There are many approaches to make a simple plank home. We used exterior tongue-and-groove board typically used for residence siding:
(the alternative side is a classic bead board.)
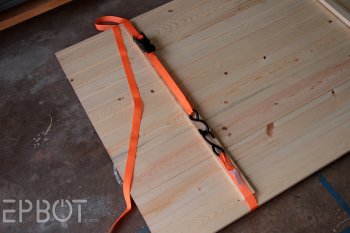
Stick the boards and lots of wood glue, and then secure all of them with ratcheting straps for a strong fit while the glue dries. The three skinny panels the thing is that ahead you will findn't connected; they may be just there to act as a brace for the straps also to make sure the door does not bend:Lock those straps down tight!
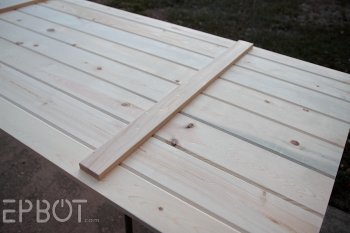
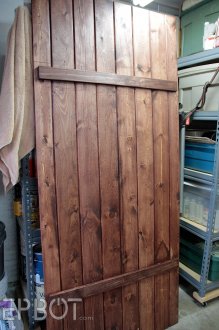
When the glue has actually dried the next day, attach cross-boards towards the door, if you prefer. (it's not necessary to, but they do add additional support & visual interest.) Right here I've also distressed my door by banging it with a hammer and screw:Today stain or paint the doorway towards inclination:I stained mine to complement the cupboard doors we only made.
 Now, on to the hardware!
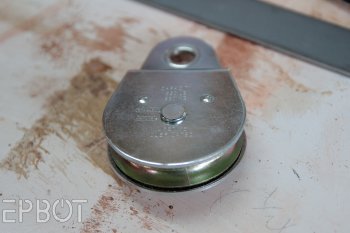
You may need two 2.5 inch pulleys appear such as this:
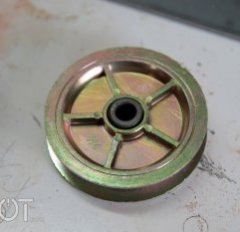
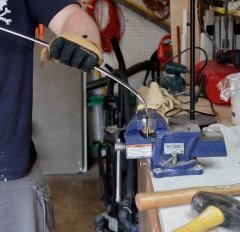
Lowe's and Home Depot didn't keep these things, but John eventually tracked some down at Ace equipment. (I also found some here on Amazon for about each.) Truly the only an element of the pulley you want is the center wheel, though, so pull the center pin and pop music that completely:Now just take a bar of 1.5 inches solid metal (available at any hardware shop), and stick one end from it in a dining table vise:
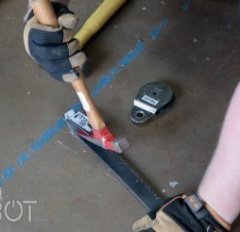
Bend it down while you see John performing right here. (This really doesn't require lots of strength; the leverage for the club does all of the do the job.) The hook you've just made is exactly whatshould hold your wheel.
You will need to cleanup the hook form, however, so next eliminate it from the vise and bang the fold flat with a hammer:You would like to get an excellent, sharp flex, so go on and hammer the point entirely down when you have to.
It’s likely you will need to flatten it too far, so today pry the hook backup a bit:
...and then slip the pulley casing in to get the distance right:Go forward and hammer in the metallic with the casing around; you will not be requiring the situation for something, so that it does not matter if it gets banged-up.
 Today test the fit with your wheel; it must fit perfectly, with only just the right level of wiggle space on either region of the wheel:
John is keeping the wheel in position together with flash; it should *not* be a strong fit.
Which is one bracket done! Today cut your club to whatever size your door calls for:Spaaaarky.
And duplicate your whole process for bracket number two. (you can observe right here that John bent both hooks on either region of the bar after which only cut it in two.) You can also desire to grind straight down your cut edges, in case they are also sharp.When you yourself have both brackets prepared, it is time to connect the rims. Drill a hole right through each hook, piercing both levels of steel:
Your wheel will likely to be sustained by a pin placed through these holes. The first pulley pin will likely be only a hair too-short, so you may want to get a slightly longer bolt with a nut to keep it in place.
In addition drill holes reduce on your bar where you desire the screws going - those who will connect the bracket towards home.
 Right. In the event that you plan to paint your equipment, nowis the time and energy to do so!
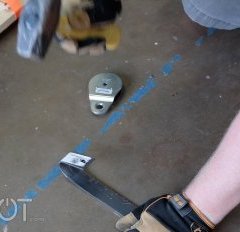
Attach your club brackets towards door. I didn't grab a photograph before we hung the entranceway, but here's a close-up of this hardware:
Today all that's remaining may be the rolly bar!
This club is the identical 1.5 inches solid steel once the home brackets, so just reduce it into the length you may need for over your doorway, and drill holes spaced about 2 foot aside down the amount of it. Make certain you drill these holes within the lower third of your bar, not directly in the middle.
Now my beautiful hand model will show how this club will affix to your wall surface:
Ok, so right here you've got a honkin' (technical term) cement anchor in John's right hand. That goes into the wall surface. That long screw protruding gets into the anchor. Amongst the metallic bar while the anchor is a half-inch steel tube, cut to about two ins long. The pipe acts as your spacer - crucial. All the holes you drilled inside club have this same create.
If it is installed, your club should look something similar to this:
Note once more the bolts can be found regarding lower third of this club, not the middle. This is important as you wish your door's wheels to roll over the bolts without hitting them.Okay, so get this: YOU'RE COMPLETE! All you have to do is raise your home into put on the track, and get to sliding!
WHEEEE!!
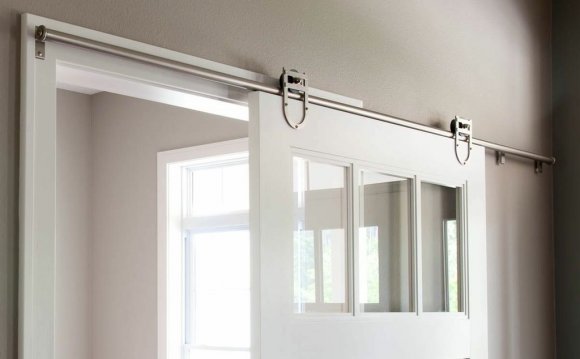
I can't also let you know just how much cleaner-looking this is certainly, dudes, therefore I'll just show you:
That's all the stuff it really is covering up: pretty much our entire pantry. The door does overlap the advantage by about four inches when it's available (the wall surface was not rather big enough for this to slip right back more), but that's not an issue for people. Eventually - no longer clutter, with no even more dirty cereal cardboard boxes! Oh, almost forgot: you will want to put in some kind of a door end, so your home doesn't get banging to the spot wall or traveling off the track. Our stop is a simple L bracket cushioned with black plastic in the reduced an element of the wall by those two pipelines. You may want to put in a stop regarding rolly club it self, however. Totally up to you.
I've outlined the basics right here, but if you prefer a more detailed barn-door tutorial (detailed with diagrams and accurate measurements), mind over to this post by Jill of Baby Rabies. There may be some slight distinctions, but overall oahu is the same practices we utilized. (and I also found it - in which else? - on Pinterest. Ha!)
RELATED VIDEO
Share this Post
latest post
-
 Doors Handles and Locks October 12, 2022
 -
 Hardware for French doors interior September 28, 2022
 -
 Interior Door Hardware September 28, 2022
 -
 Wicker out Door Furniture September 28, 2022
 -
 Lever Handles Door Hardware September 27, 2022
 -
 Soft close Door Hardware September 14, 2022
 -
 Commercial Doors, Hardware, Parts September 14, 2022
 -
 Drawer Door Knobs September 14, 2022
 -
 Front door furniture UK September 14, 2022